When you first sign up to Jumpalead, your account includes a few ready-made workflows (also known as automations). These handle common lead management tasks automatically, so new enquiries are tagged, sorted, and added to the right pipelines without any manual work.
You’ll just need to check that each one is configured correctly for your account.
🕒 Tip: It’s best to set up or review these automations after your first ad campaign is created, but don’t wait too long. If you leave it too late, new leads may come in before your workflows are active and won’t be tagged or sorted correctly.
What Automations Do
Automations help you stay organised and respond faster to new leads. They can:
Tag incoming leads based on the form they submitted
Add those leads to the correct pipeline (for example, “Appraisal Leads” or “Listing Enquiries”)
Create new opportunities automatically in your CRM
How to Check Your Workflows
Go to Automation → Workflows From the left menu, click Automation then select the Workflows tab. You’ll see a list of preloaded workflows such as:
Appraisal Tag
Listing Tag
Add to Appraisal Lead Pipeline
Add to Listing Enquiry Pipeline
Open Each Workflow Click a workflow name to open it. This will show the automation builder view, where you’ll see a Trigger (what starts the workflow) and Actions (what happens next).
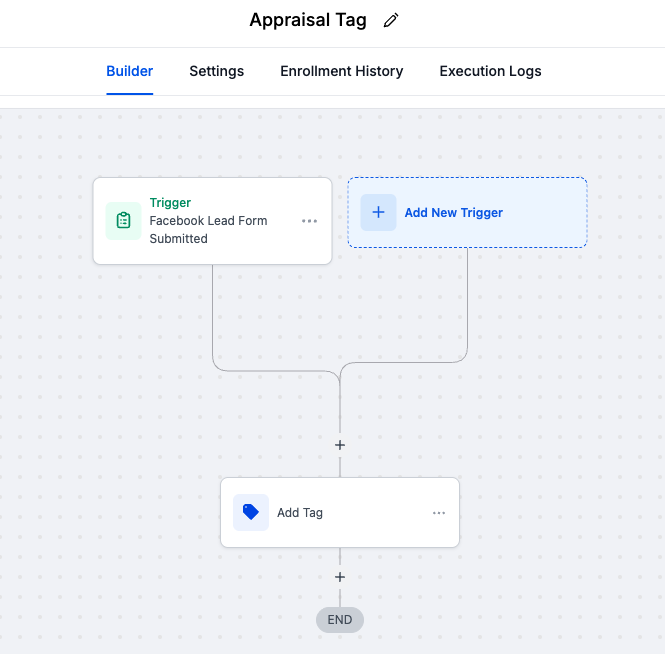
Confirm the Trigger is Correct The trigger is usually a Facebook Lead Form Submitted event. For example, the “Appraisal Tag” workflow might use the trigger Facebook Lead Form Submitted → Appraisal Form. Make sure it matches the form you’re using in your ads.
Check the Tag or Pipeline Action
The Appraisal Tag workflow should add the tag “Appraisal”
The Add to Appraisal Lead Pipeline workflow should move anyone with the “Appraisal” tag into the “Appraisal Leads” pipeline
The Listing Enquiry versions do the same for general property enquiries\
Update if Needed If you’ve renamed your forms or pipelines, update the workflow so everything still matches. You can do this by clicking the action and selecting the correct form, tag, or pipeline from the dropdown.
Save and Publish Once confirmed, click Save and make sure each workflow is Published (not in Draft). This ensures automations start running as soon as new leads come in.
Important Notes
Automations will only apply to new leads that come in after they’re published. Leads already in your CRM won’t be updated automatically.
If you want to apply a workflow to older leads, you can bulk enrol them later. (We’ll link to a step-by-step guide for this once published.)
Example Setup
Here’s how the automation chain works together:
A lead submits the “Appraisal Request” form on Facebook
The Appraisal Tag workflow adds the tag Appraisal
The Add to Appraisal Lead Pipeline workflow detects the tag and adds the lead to your “Appraisal Leads” pipeline
From there, you can track progress, follow up, and manage the opportunity
Next Step
Once your automations are configured, new leads from your ads will flow automatically into your CRM, correctly tagged, sorted, and ready to follow up. You can review workflow activity anytime from the Enrollment History tab inside each workflow.
Still need help?
If something’s not working or you just need a hand, we’re here to help. Reach out and we’ll get back to you as soon as we can.


.svg)